小技巧
裁剪超出view的视图
self.shopsView.clipsToBounds = YES;
设置图片视图大小
//    UIImageView *imageView = [[UIImageView alloc] init];
//    imageView.image = [UIImage imageNamed:@"minion"];
//    imageView.frame = CGRectMake(0, 0, imageView.image.size.width, imageView.image.size.height);
//下面等价于上面三句
 UIImageView *imageView = [[UIImageView alloc] initWithImage:[UIImage imageNamed:@"minion"]];
关于addTarget
哪个控件触发addTarget的事件 就可以把这个控件传递给addTarget调用的方法
关于指针
默认情况下,任何指针都是强指针
让数组对象都执行某个方法
移除所有的子控件
[self.scrollView.subviews makeObjectsPerformSelector@selector(removeFromSuperview)];
UILabel设置圆角
对于UIView 直接设置 uiview.layer.cornerRadius = 5 就可以有圆角了
但是对于UILabel则不然, 要多设置一个uilabel.clipsToBounds = YES; 才行
@,@[],@{}
5不是对象,加个@5,会将其转化成对象[NSNumber numberWithInt:5],@就是一种简便写法,
如@[]代表数组,@{}代表NSDictionary
ios url 编码和解码
1.url编码
ios中http请求遇到汉字的时候,需要转化成UTF-8,用到的方法是:
NSString * encodingString = [urlString stringByAddingPercentEscapesUsingEncoding:NSUTF8StringEncoding];
2.url解码
请求后,返回的数据,如何显示的是这样的格式:%3A%2F%2F,此时需要我们进行UTF-8解码,用到的方法是:
NSString *str = [model.album_name stringByReplacingPercentEscapesUsingEncoding:NSUTF8StringEncoding];
initWithFrame 和 initWithCoder
当我们所写的程序里没用用Nib文件(XIB)时,用代码控制视图内容,需要调用initWithFrame去初始化
- (id)initWithFrame:(CGRect)frame
{
    if (self =[superinitWithFrame:frame]) {
        // 初始化代码
    }
    return self;
}
用于视图加载nib文件,从nib中加载对象实例时,使用 initWithCoder初始化这些实例对象
- (id)initWithCoder:(NSCoder*)coder
{
    if (self =[superinitWithcoder:coder]) {
        // 初始化代码
    }
    return self;
}
自动断点
在奔溃或错误的地方打上断点

隐藏手机号中间四位
NSString *tel = [originTel stringByReplacingCharactersInRange:NSMakeRange(3, 4) withString:@"****"];
单选Cell
调用之前Cell的拥有者要变为控制器
- (IBAction)defaultClick:(id)sender event:(id)event{
    NSSet *touches =[event allTouches];
    UITouch *touch =[touches anyObject];
    CGPoint currentTouchPosition = [touch locationInView:_tableView];
    NSIndexPath *indexPath= [_tableView indexPathForRowAtPoint:currentTouchPosition];
    if (indexPath!= nil){
        BankCardTableViewCell *cell = [self.tableView cellForRowAtIndexPath:indexPath];
        [self todo:cell];
    }
}

-(void)todo:(BankCardTableViewCell *)cell{
    for (NSInteger i = 0;i < [self.userCardArray count]; i ++) {
        NSIndexPath *index = [NSIndexPath indexPathForRow:i inSection:0];
        BankCardTableViewCell *cell = [self.tableView cellForRowAtIndexPath:index];
        cell.defaultState = NO;
    }
    cell.defaultState = YES;
    [self.tableView reloadData];
}
获取tableView的Cell内容
NSIndexPath *pathOne=[NSIndexPath indexPathForRow:0 inSection:3];//获取cell的位置
CertificationCell *cellOne = (CertificationCell *)[self.tableView cellForRowAtIndexPath:pathOne];
testString=cellOne.contentTextField.text;
NSLog(@"testString---%@",testString);
id不能调用点语法,只能[]调用方法
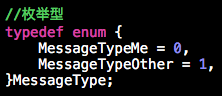
枚举型

比较两个数值的大小

退出键盘
    // 退出键盘
    [self.messageField resignFirstResponder];
    [self.messageField endEditing:YES];
    [self.view endEditing:YES];
测试和正式代码
#ifdef DEBUG // 调试阶段
#define XMGLog(...)  NSLog(__VA_ARGS__)

#else // 发布阶段

#define XMGLog(...)

#endif
控件大小由图片决定
[btn sizeToFit];
禁止渲染图片
// 在iOS7之后默认会把导航条上面的按钮渲染成蓝色
    UIImage *image = [UIImage imageNamed:@"navigationbar_friendsearch"];

    // 通过代码告诉苹果不要渲染图片
    // 也可以在图片集中设置
    image = [image imageWithRenderingMode:UIImageRenderingModeAlwaysOriginal];
静态变量优于宏
//静态变量优于宏 因为每次只要读取一次就行了
#define myDefaults [NSUserDefaults standardUserDefaults]

static NSString *accountKey = @"account";
static NSString *pwdKey     = @"pwd";
static NSString *rmbKey     = @"rmd";
static NSString *loginKey   = @"login";

//static 是全局变量 程序存在都不会消失 都是同一个
//static 在.m中只有本文件能访问 外部不能访问
在iOS7之后,导航控制器显示的情况下所有UIScrollView顶部都会添加额外的滚动区域(64)导航条加状态栏
自定义宏
#define keyPath(objc,keyPath) @(((void)objc.keyPath,#keyPath))
http打开

xib创建自定义视图的时候一定要记得(xib代码混编 不知名bug)
self.autoresizingMask = UIViewAutoresizingNone;
导航栏透明的时候xib还是代码 都会从(0,0)开始所以要加一句
self.navigationController.navigationBar.translucent = NO;
在Xib中绘制1像素的线
首先创建 NSLayoutConstraint 的子类 NSLayoutConstraintOnePixelLine
// NSLayoutConstraintOnePixelLine.m
#import"NSLayoutConstraintOnePixelLine.h"
@implementation NSLayoutConstraintOnePixelLine

- (void)awakeFromNib {
  [super awakeFromNib];
  if (self.constant == 1) {
    self.constant = 1 / [UIScreen mainScreen].scale;
  }
}
@end

作者:RanGang
链接:http://www.jianshu.com/p/396fc6244ff8
來源:简书
著作权归作者所有。商业转载请联系作者获得授权,非商业转载请注明出处。
然后给我们想要设置为 1pixel 的 view 设置上约束,大小为 1。
再把该约束所属的类改成刚刚写的子类就可以了。
代码中更改Icon图标
1.Info.plist
CFBundleIcons CFBundlePrimaryIcon CFBundleIconFiles 原AppIcon图标名 CFBundleAlternateIcons icon01 CFBundleIconFiles AppIcon图标名2 icon02 CFBundleIconFiles AppIcon图标名3
2.将所有AppIcon放入工程中(不要放在Assets.xcassets)
// 更换
if ([UIApplication sharedApplication].supportsAlternateIcons) {
       [[UIApplication sharedApplication] setAlternateIconName:图标名 completionHandler:^(NSError * _Nullable error) {
           if (!error) {
               NSLog(@"success:%@",图标名);
           }else{
               NSLog(@"error:%@",error);
           }
       }];
   } else {
       NSLog(@"不能更换icon");
       return;
   }
}
// 还原
if ([UIApplication sharedApplication].alternateIconName != nil) {  // 图标被替换过
       // 重置icon
       [[UIApplication sharedApplication] setAlternateIconName:nil completionHandler:^(NSError * _Nullable error) {
           if (!error) {
               NSLog(@"success");
           } else {
               NSLog(@"error:%@",error);
           }
       }];
   }
UIButton点击无效可能是控制器被释放
解决方法
// add child viewController
    UIViewController* controller = [self.storyboard instantiateViewControllerWithIdentifier:@"test"];
    [self addChildViewController:controller];
    controller.view.frame = CGRectMake(0, 44, 320, 320);
    [self.view addSubview:controller.view];
    [controller didMoveToParentViewController:self];

// remove child viewController
    UIViewController *vc = [self.childViewControllers lastObject];
    [vc.view removeFromSuperview];
    [vc removeFromParentViewController];
代码界面搭建转XIB写法
//initWithCoder中的frame以xib控件大小来计算

- (instancetype)initWithCoder:(NSCoder *)coder
{
    self = [super initWithCoder:coder];
    if (self) {
        //边框
        //[self layoutIfNeeded];
        self.layer.cornerRadius = self.bounds.size.height * 0.5;
        self.layer.masksToBounds = YES;
        self.backgroundColor = [UIColor whiteColor];
        self.layer.borderColor = [KProgressColor CGColor];
        self.layer.borderWidth = KProgressBorderWidth;

        //进度
        UIView *tView = [[UIView alloc] init];
        tView.backgroundColor = KProgressColor;
        tView.layer.cornerRadius = (self.bounds.size.height - (KProgressBorderWidth + KProgressPadding) * 2) * 0.5;
        tView.layer.masksToBounds = YES;
        [self addSubview:tView];
        self.tView = tView;
    }
    return self;
}
WKWebView 点击链接无反应
wkWebView 点击链接无反应
多半是因为网页中有target="_blank" 在新窗口打开链接
而你有没有实现createWebViewWithConfiguration
-(WKWebView*)webView:(WKWebView*)webView createWebViewWithConfiguration:(WKWebViewConfiguration*)configuration forNavigationAction:(WKNavigationAction*)navigationAction windowFeatures:(WKWindowFeatures*)windowFeatures

{

        NSLog(@"createWebViewWithConfiguration");

        if(!navigationAction.targetFrame.isMainFrame) {

                [webViewloadRequest:navigationAction.request];

            }

        return nil;

}